TABLE OF CONTENTS
- Step 1: Start Configuration in AskQ
- Step 2: Set up Service Provider in the Infor Portal
- Step 3: Upload Infor XML file to AskQ
- Step 4: Set up the AskQ Application
- Step 5: Create a Workspace Widget
AskQ can be embedded directly into the Infor Portal, either as a widget on workspaces or as an application. This article covers how to set up Infor SSO and the embedding process.
Step 1: Start Configuration in AskQ
As an administrator, navigate to AskQ > Settings > Integrations.
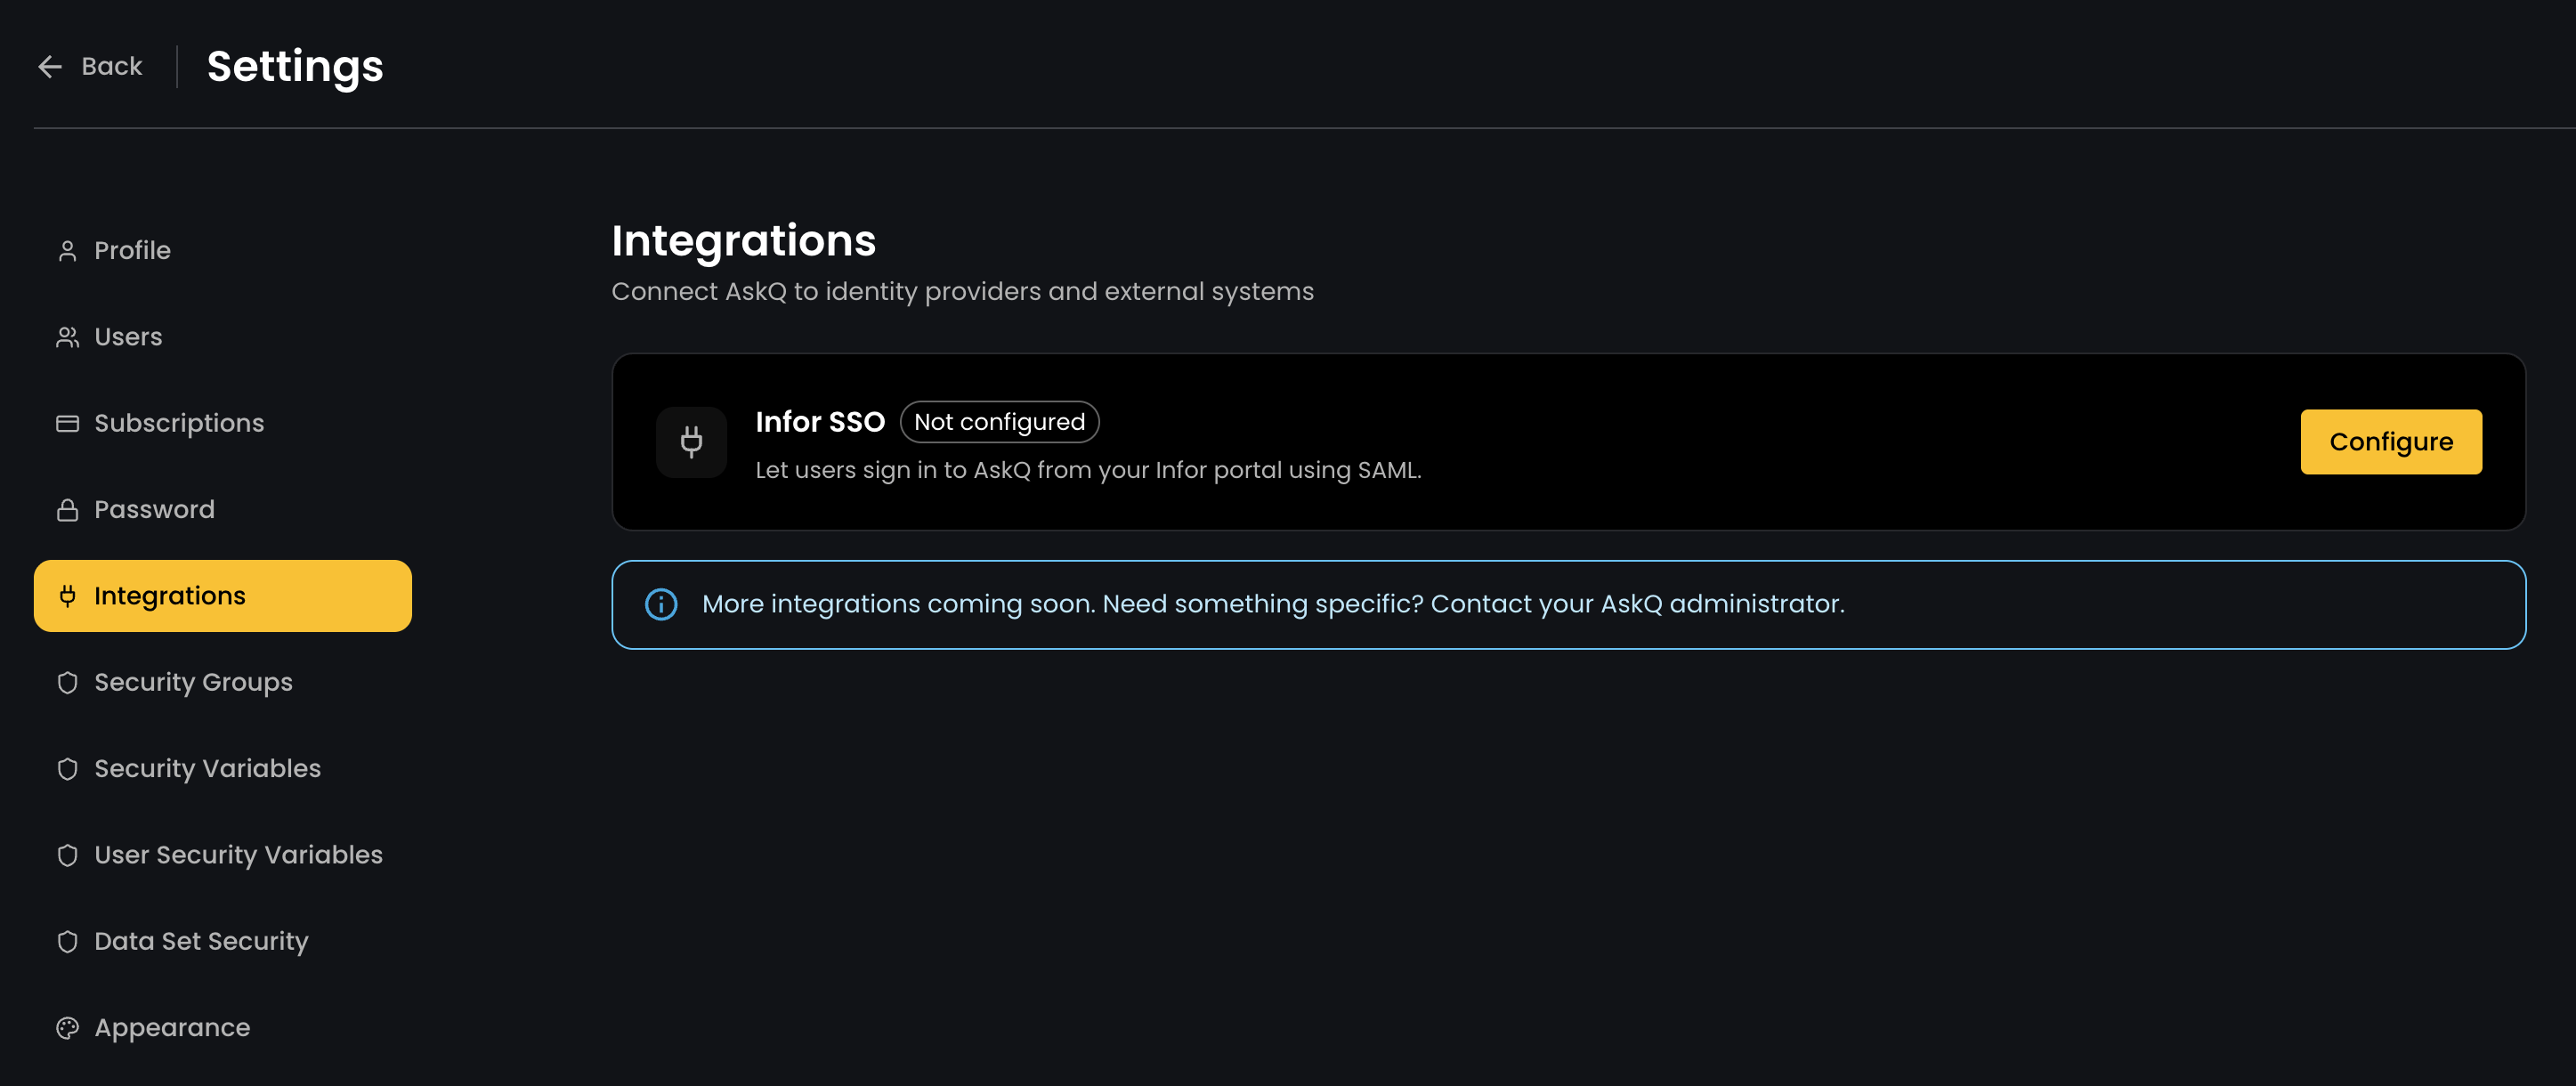
Click 'Configure' on the Infor SSO integration option to open the configuration modal box below.
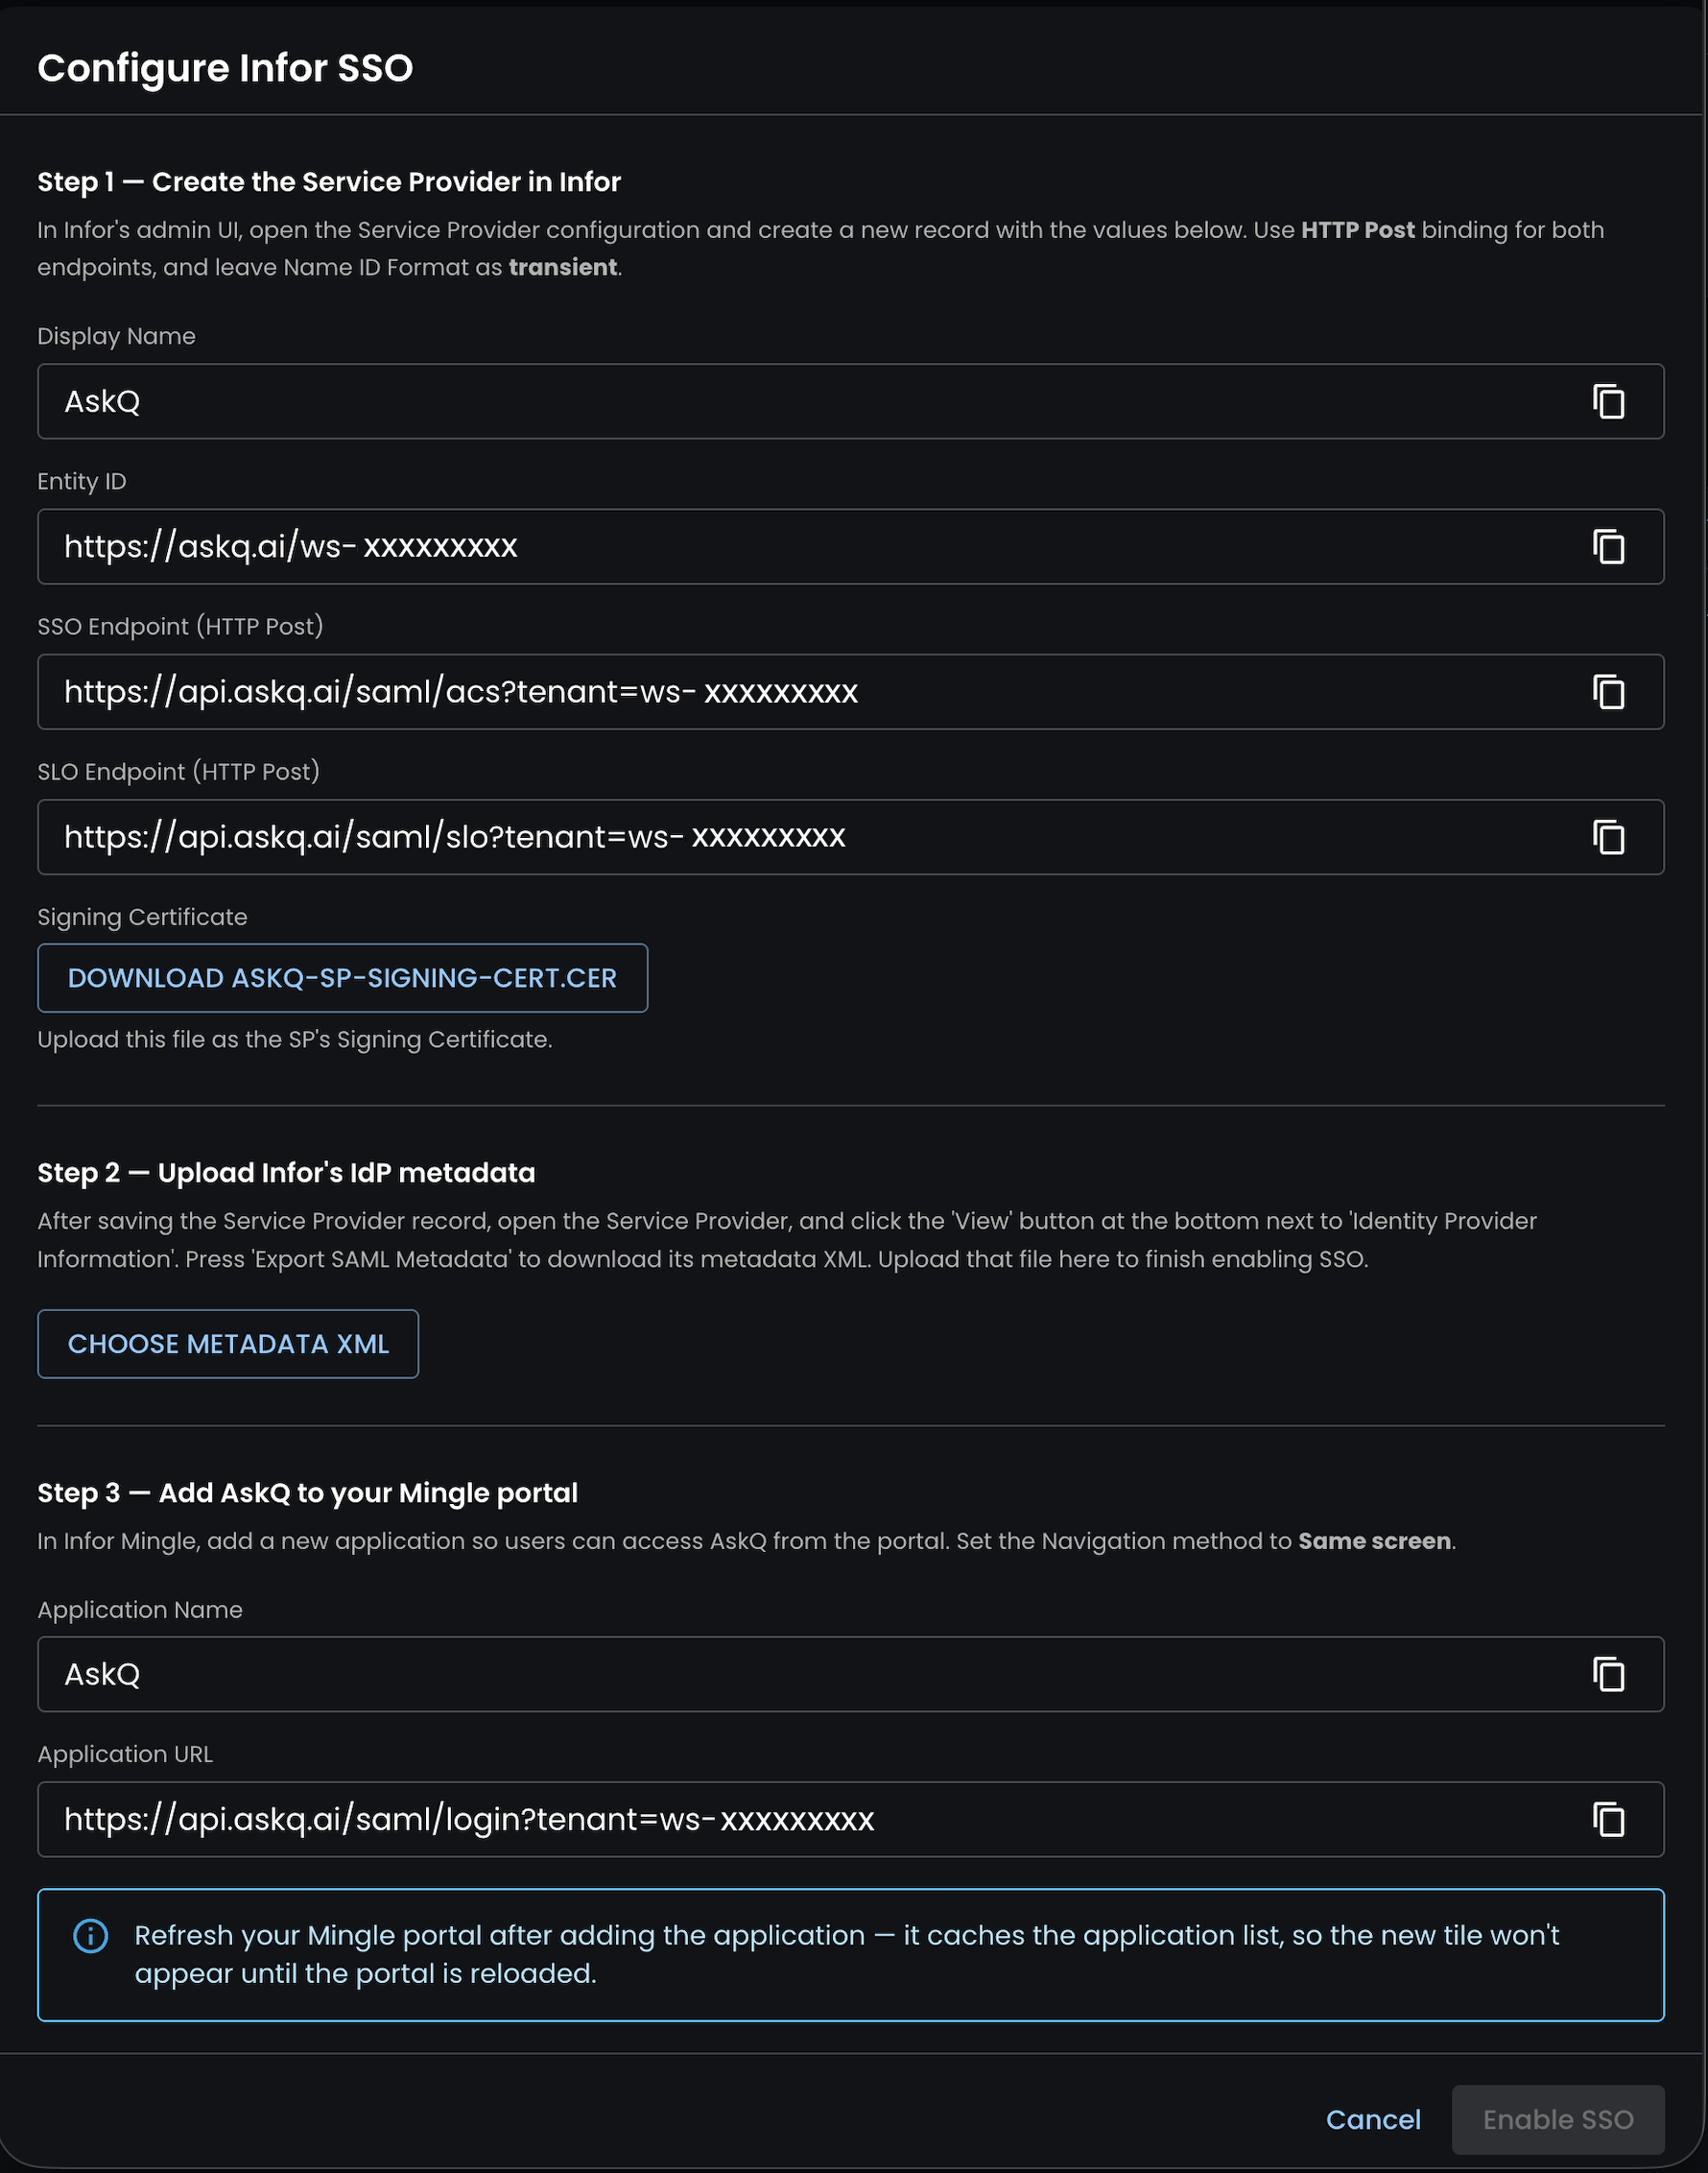
Press the button labelled 'DOWNLOAD ASKQ-SP-SIGNING-CERT.CER' for use in the next step. Keep a note of the Application URL listed here for use in Step 4 and Step 5.
Leave this box open in a tab as we'll be uploading a file to this window in Step 2.
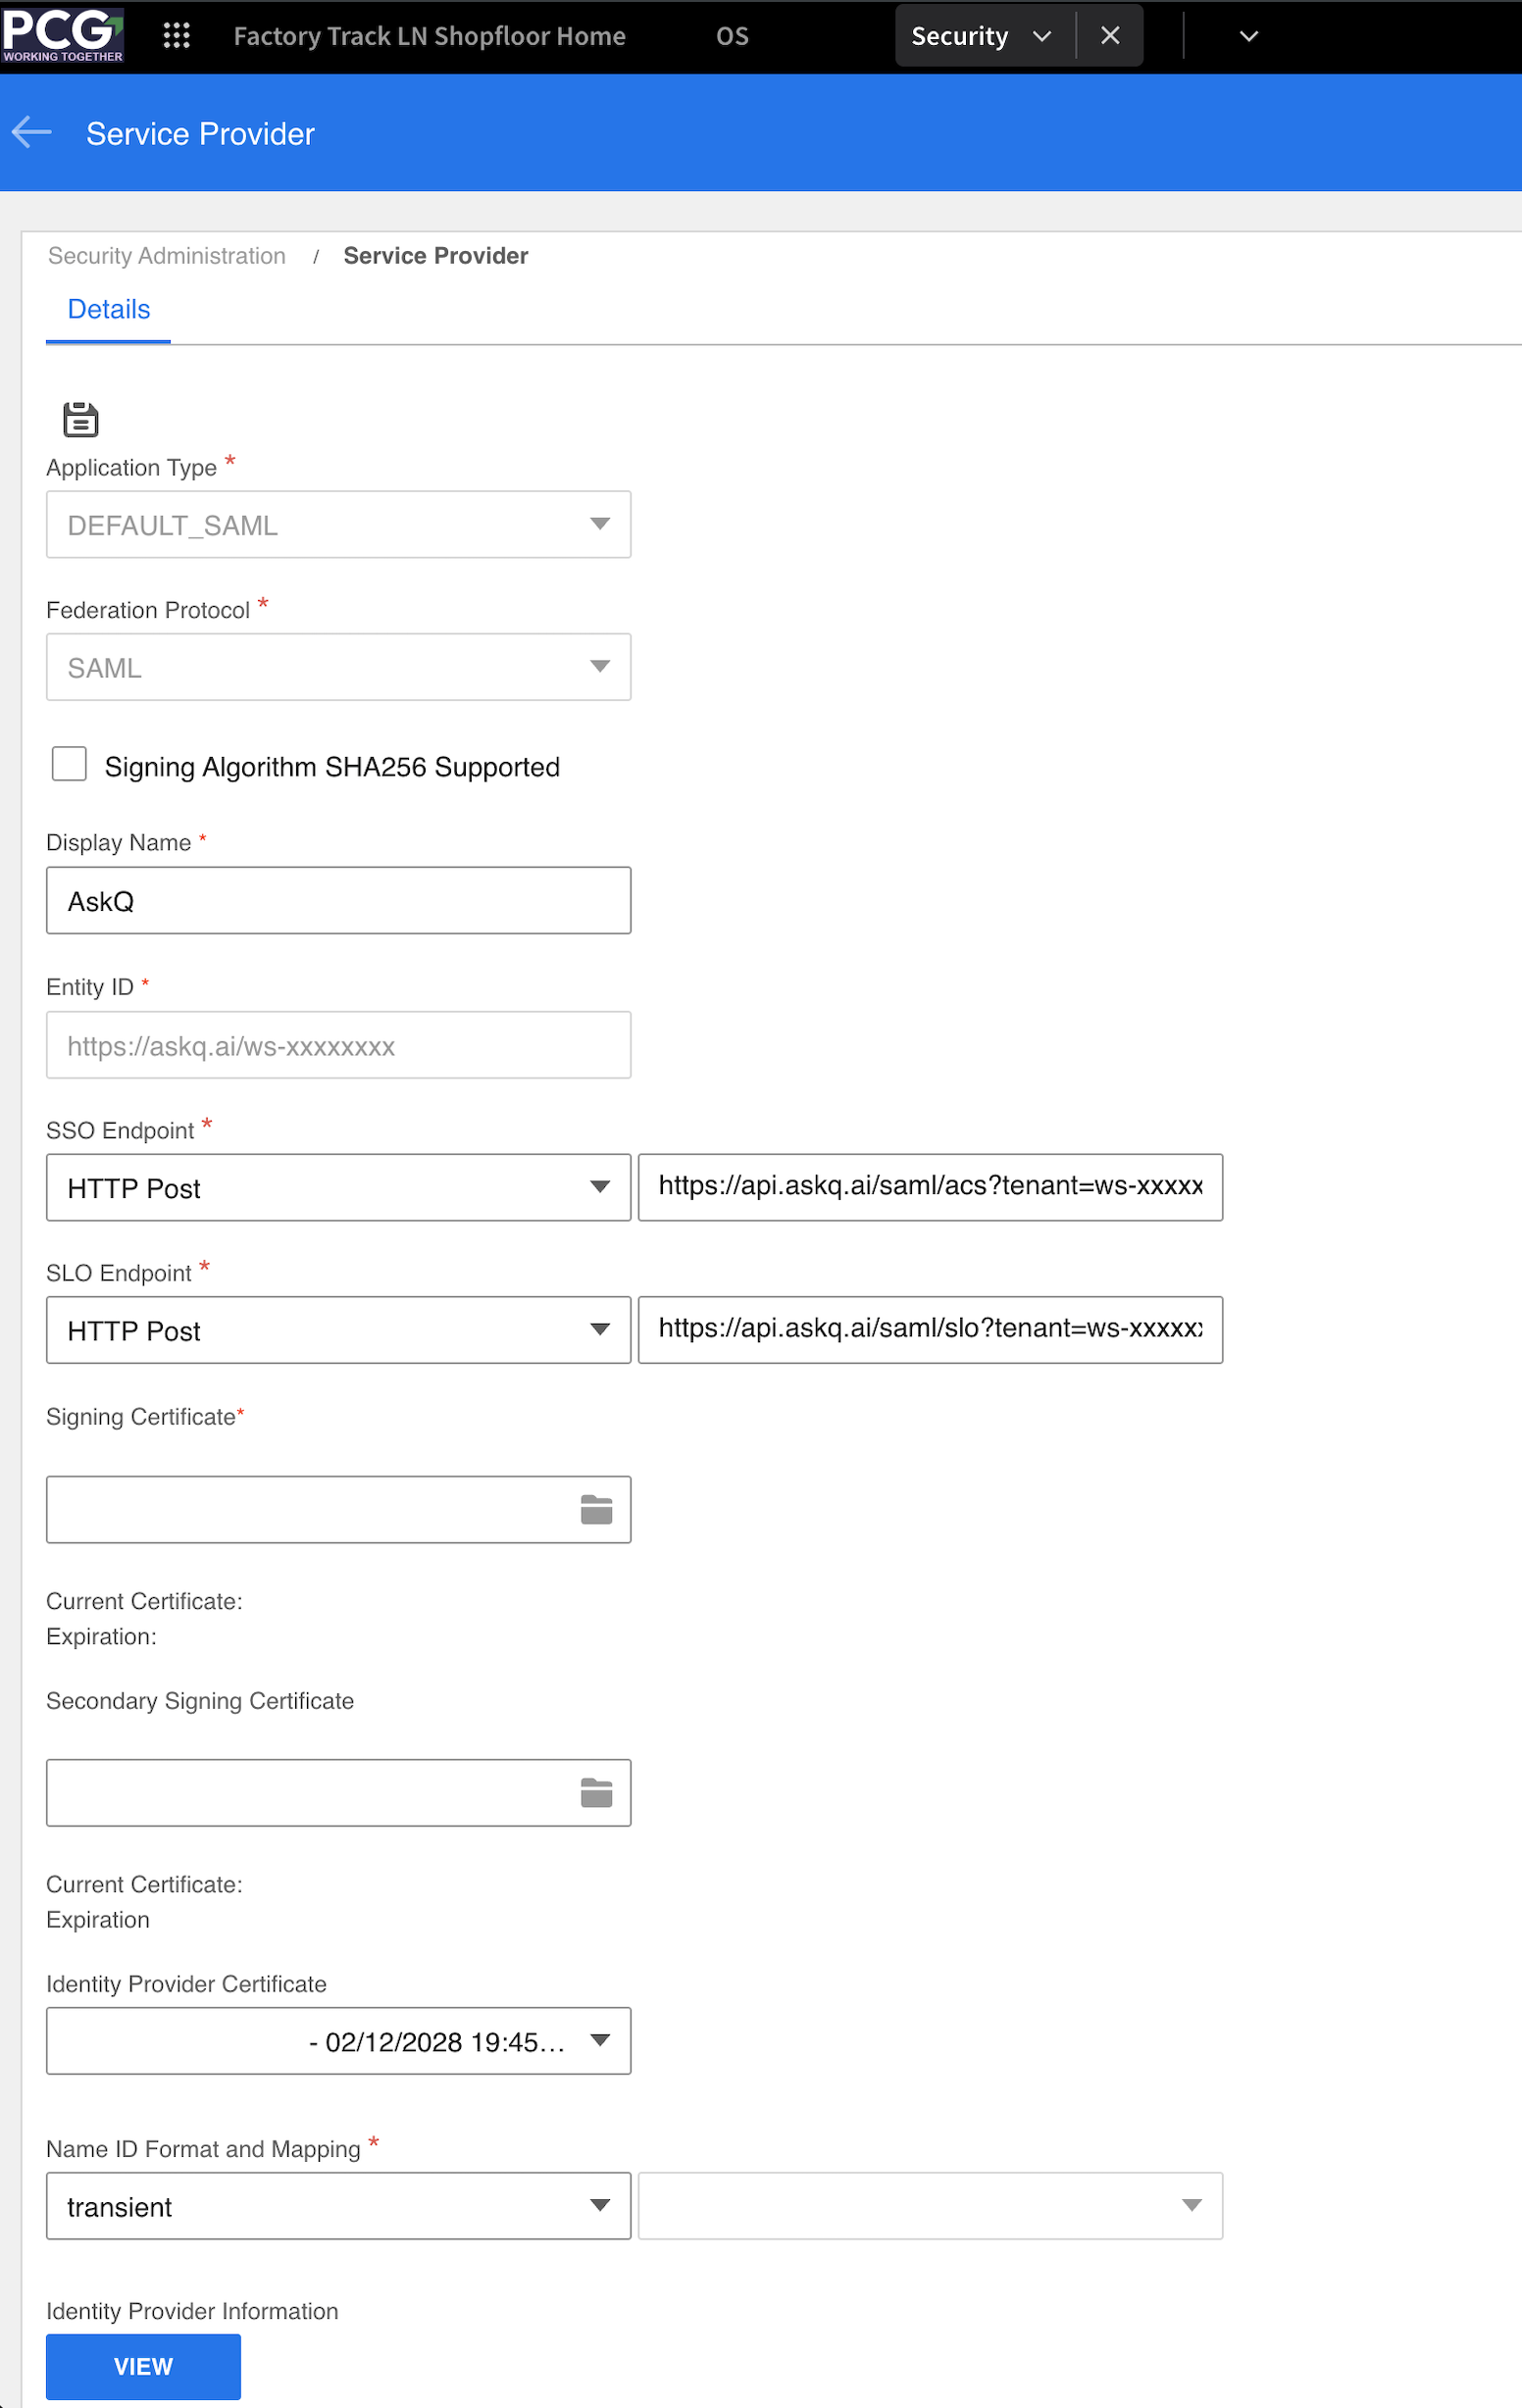
Step 2: Set up Service Provider in the Infor Portal
As an admin, in the Infor Portal, navigate to OS > Security > Security Administration.
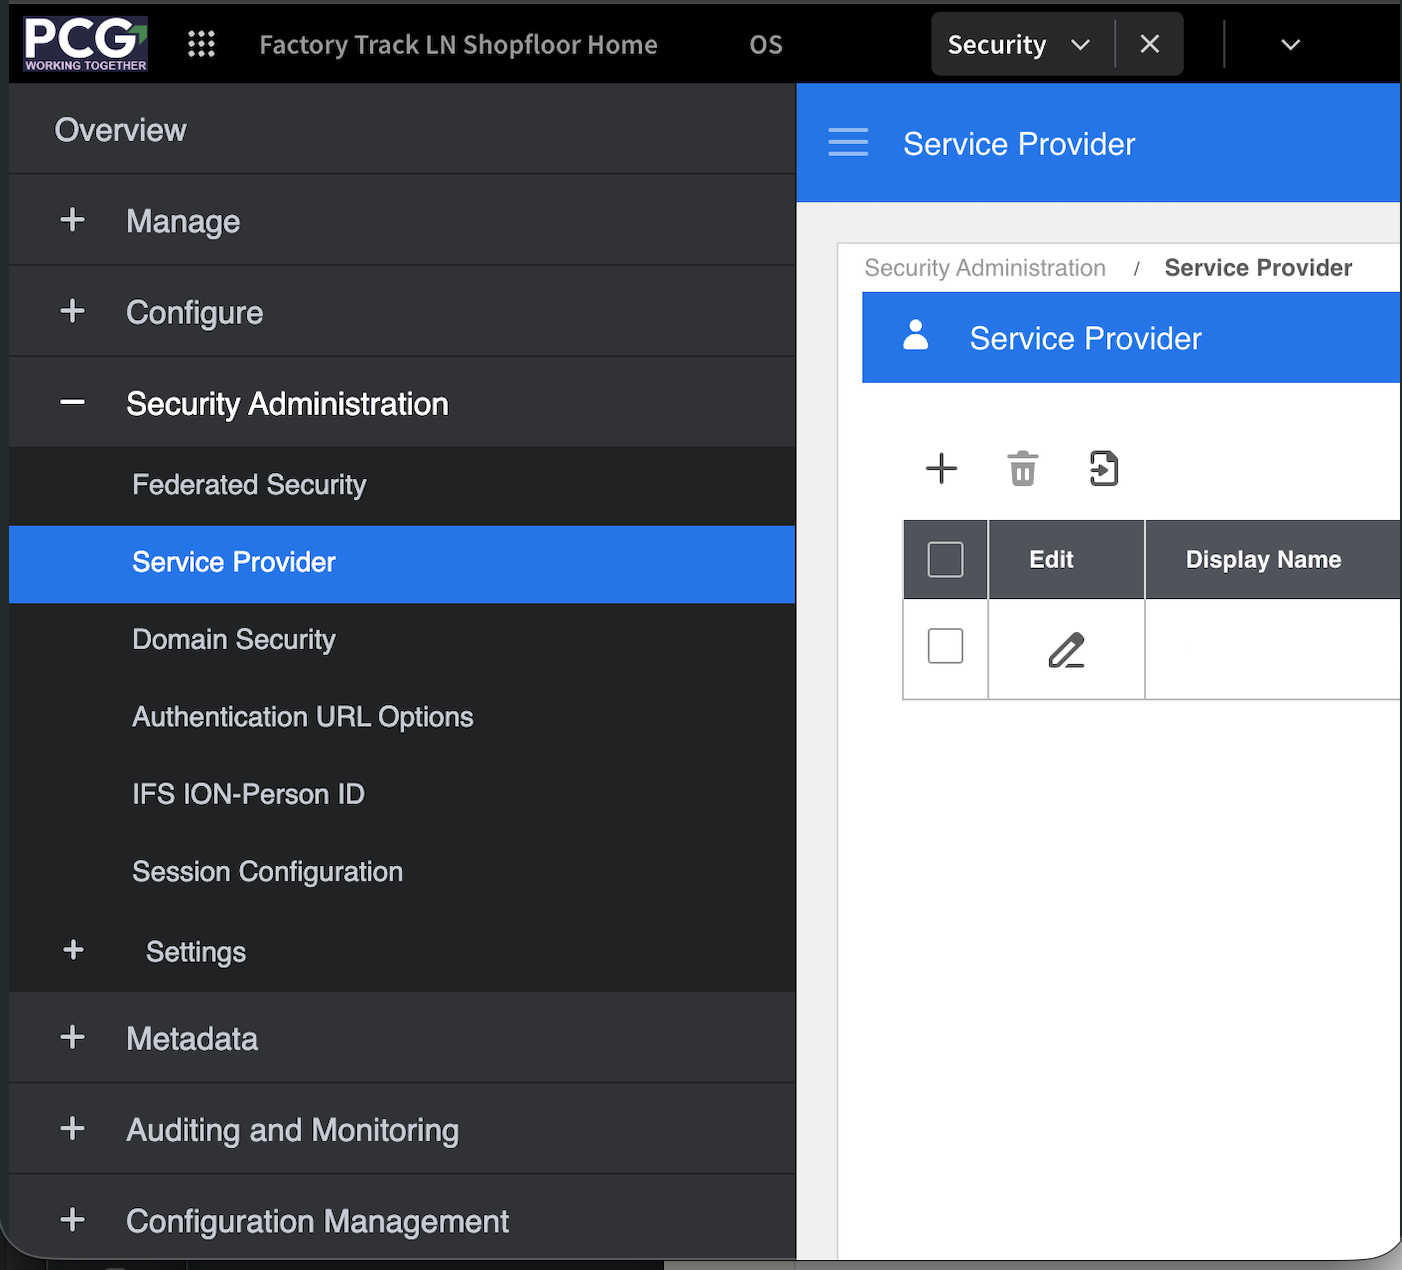
Press the '+' button to create a new Service Provider. Set the values as follows:
- Application Type: DEFAULT_SAML
- Display Name: Copy value from the AskQ Configure page labelled 'Display Name'
- Entity ID: Copy value from the AskQ Configure page labelled 'Entity ID'
- SSO Endpoint: Drop down value. HTTP Post
- SSO Endpoint: Text box value. Copy value from the AskQ Configure Page labelled 'SSO Endpoint (HTTP Post)'
- SLO Endpoint: Drop down value. HTTP Post
- SLO Endpoint: Text box value. Copy value from the AskQ Configure Page labelled 'SLO Endpoint (HTTP Post)'
- Signing Certificate: Upload the certificate file downloaded in the previous step.
- All other boxes can be left as default values
Press the Save icon at the top

Step 3: Upload Infor XML file to AskQ
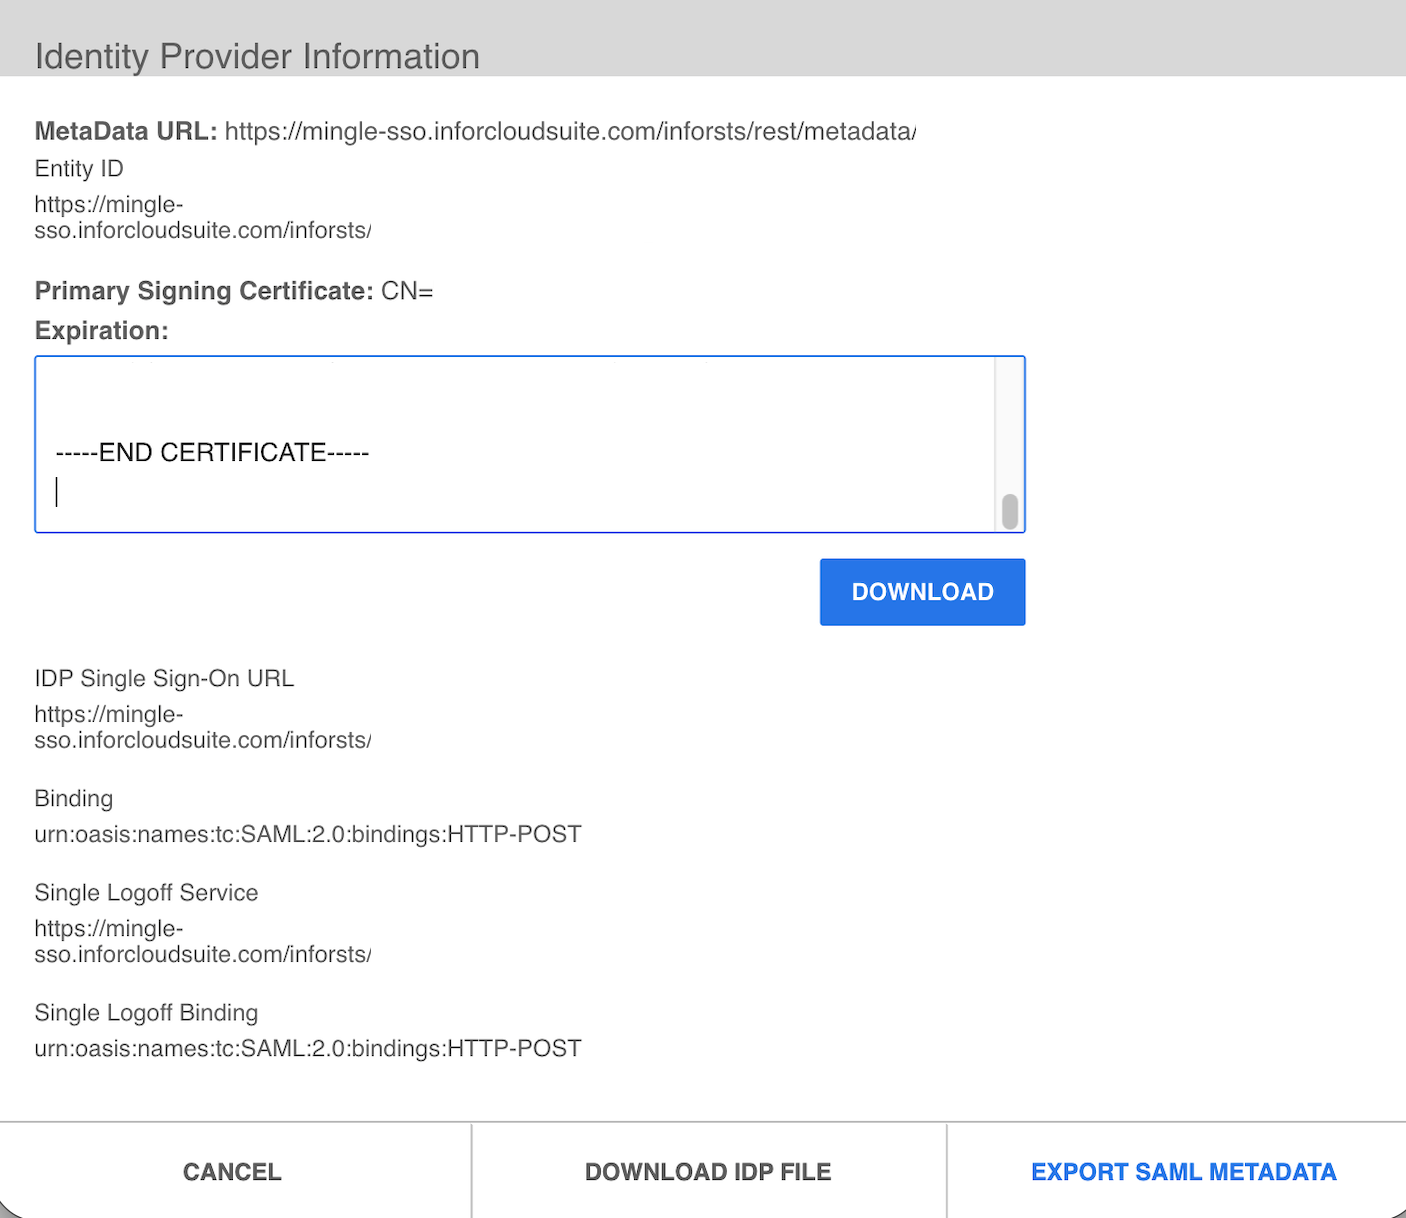
Once the Service Provider is set up in the previous step, locate the Service Provider in the list and press the Edit icon. Note you may need to click on the 'Service Provider' box to expand the list of Service Providers.
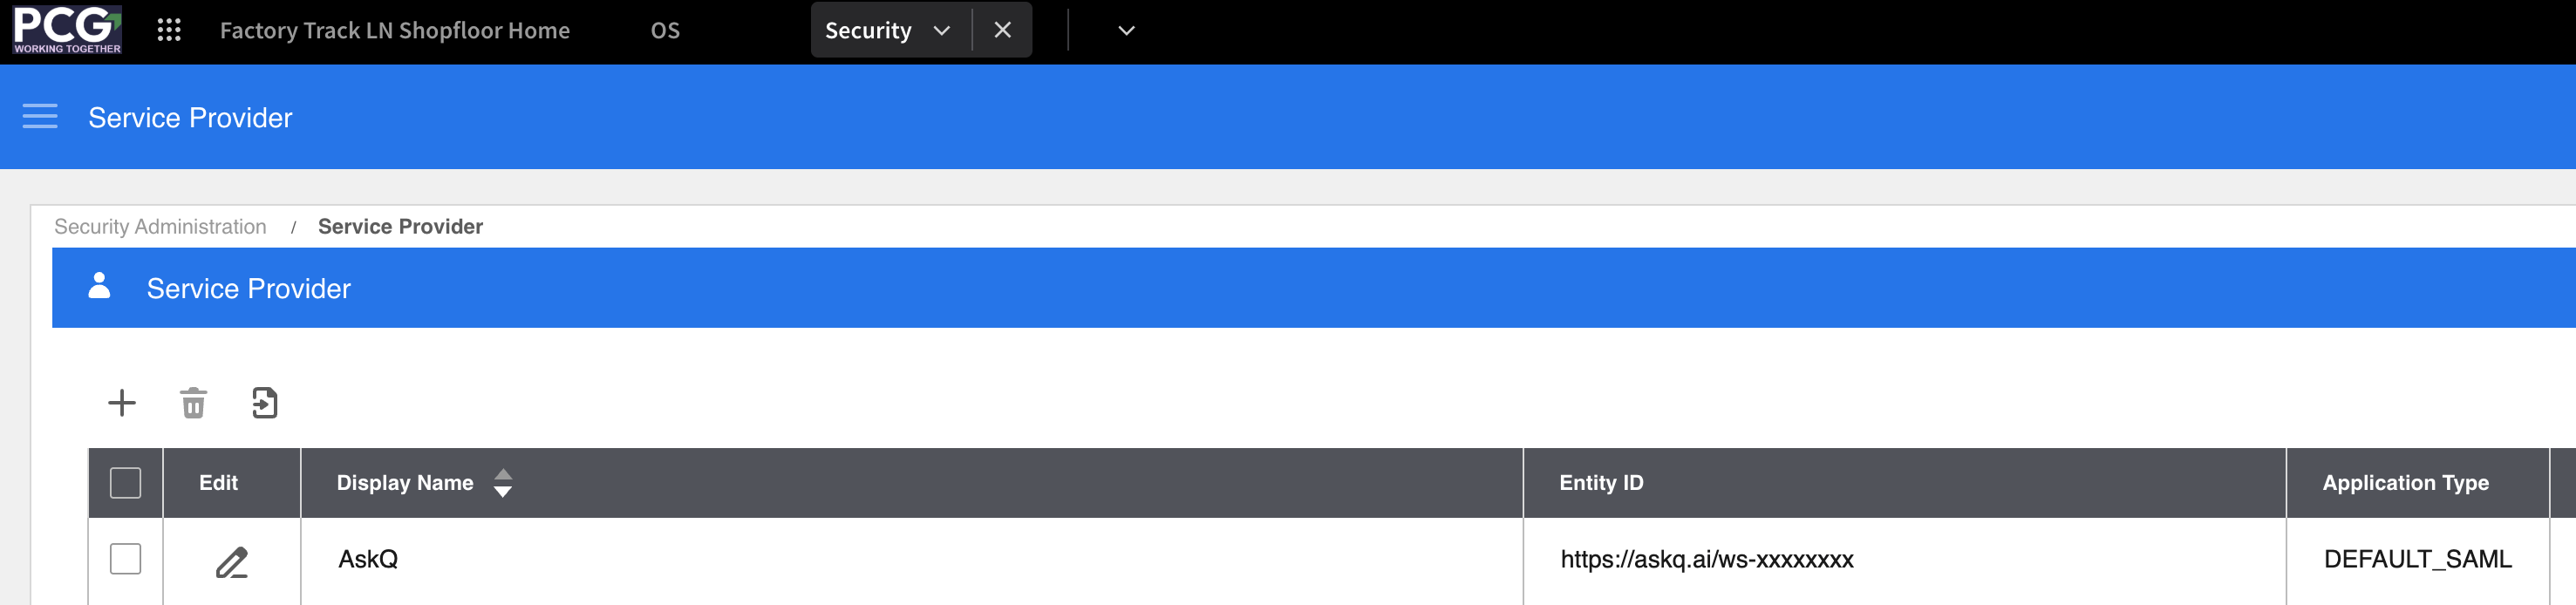
At the bottom of the page, click the 'VIEW' button next to the 'Identity Provider Information' label.
In the Identity Provider Information view, click the button labelled 'EXPORT SAML METADATA'. This will download an XML file.
In AskQ, on the Integrations page inside the Configure box for Infor SSO, press the button labelled 'CHOOSE METADATA XML' and upload the XML file that was just downloaded.
Step 4: Set up the AskQ Application
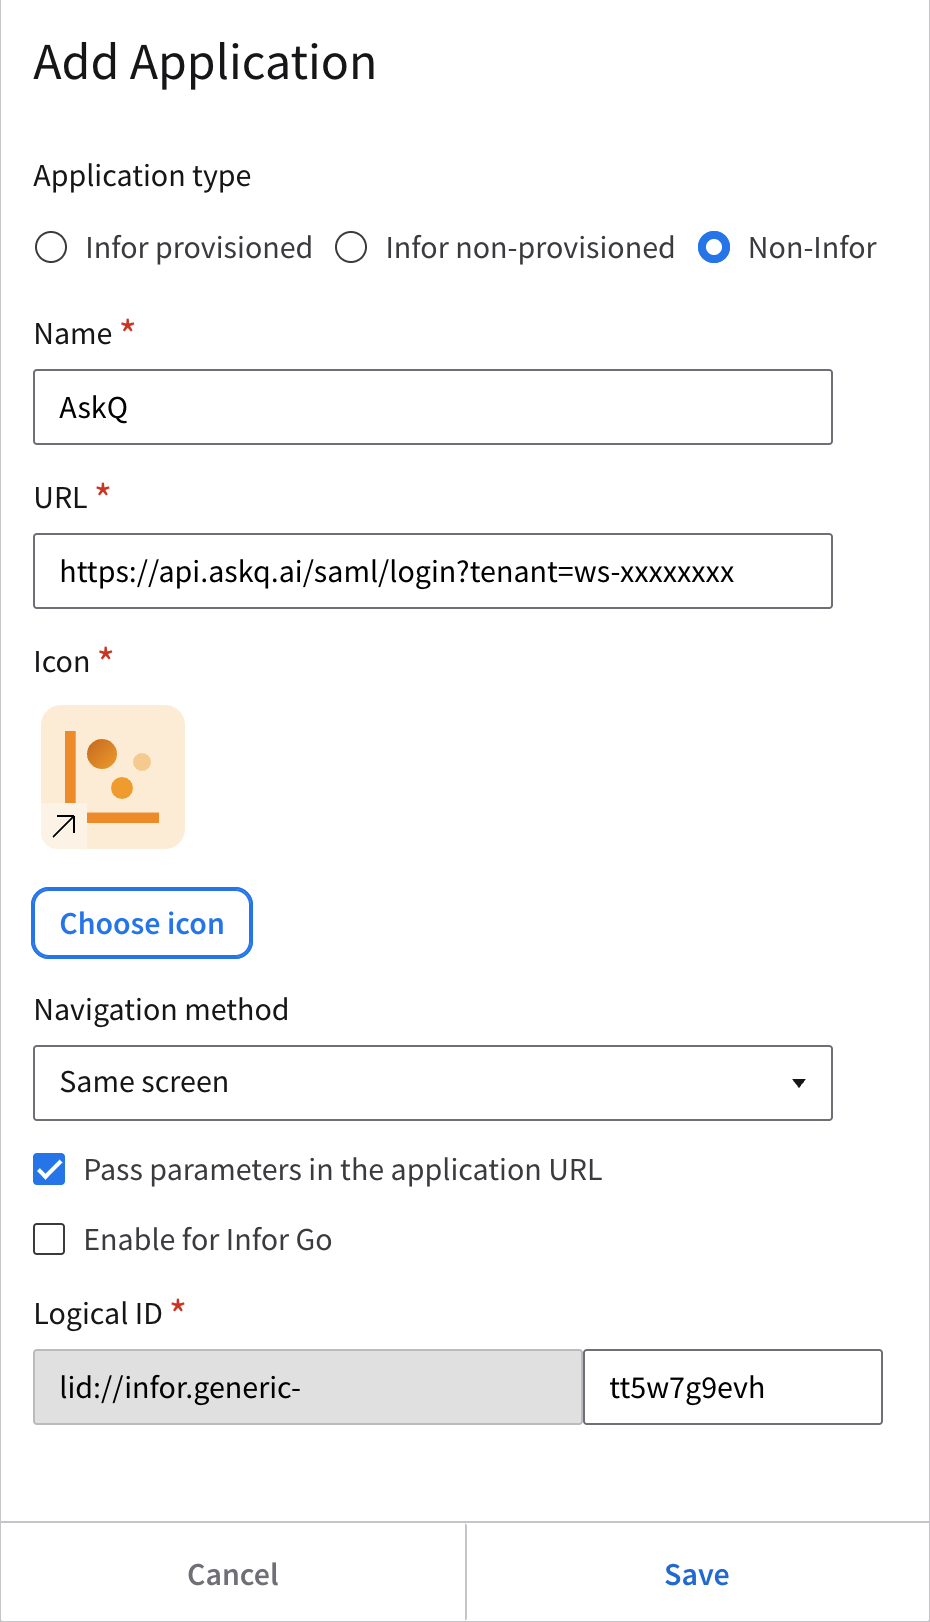
To set up AskQ as an application in the Infor Portal, login to the Infor Portal and navigate to OS > Portal > Applications. Press 'Add Application'.
Select the following options:
- Application Type: Non-Infor
- Name: AskQ
- URL: Copy in the Application URL from Step 2. This can also be found in the Configure section of the Infor SSO Integration option inside AskQ.
- Icon: Pick a suitable Icon
- All other options are default values.
Press Save
Once saved, use the Permissions tab to add Infor roles or Users directly to the application. You can create custom security roles inside Infor OS to control access to AskQ.

Note: that a User will need to be set up as a User in AskQ with the same email address to correctly authenticate. The SSO process does not automatically provision users in AskQ.
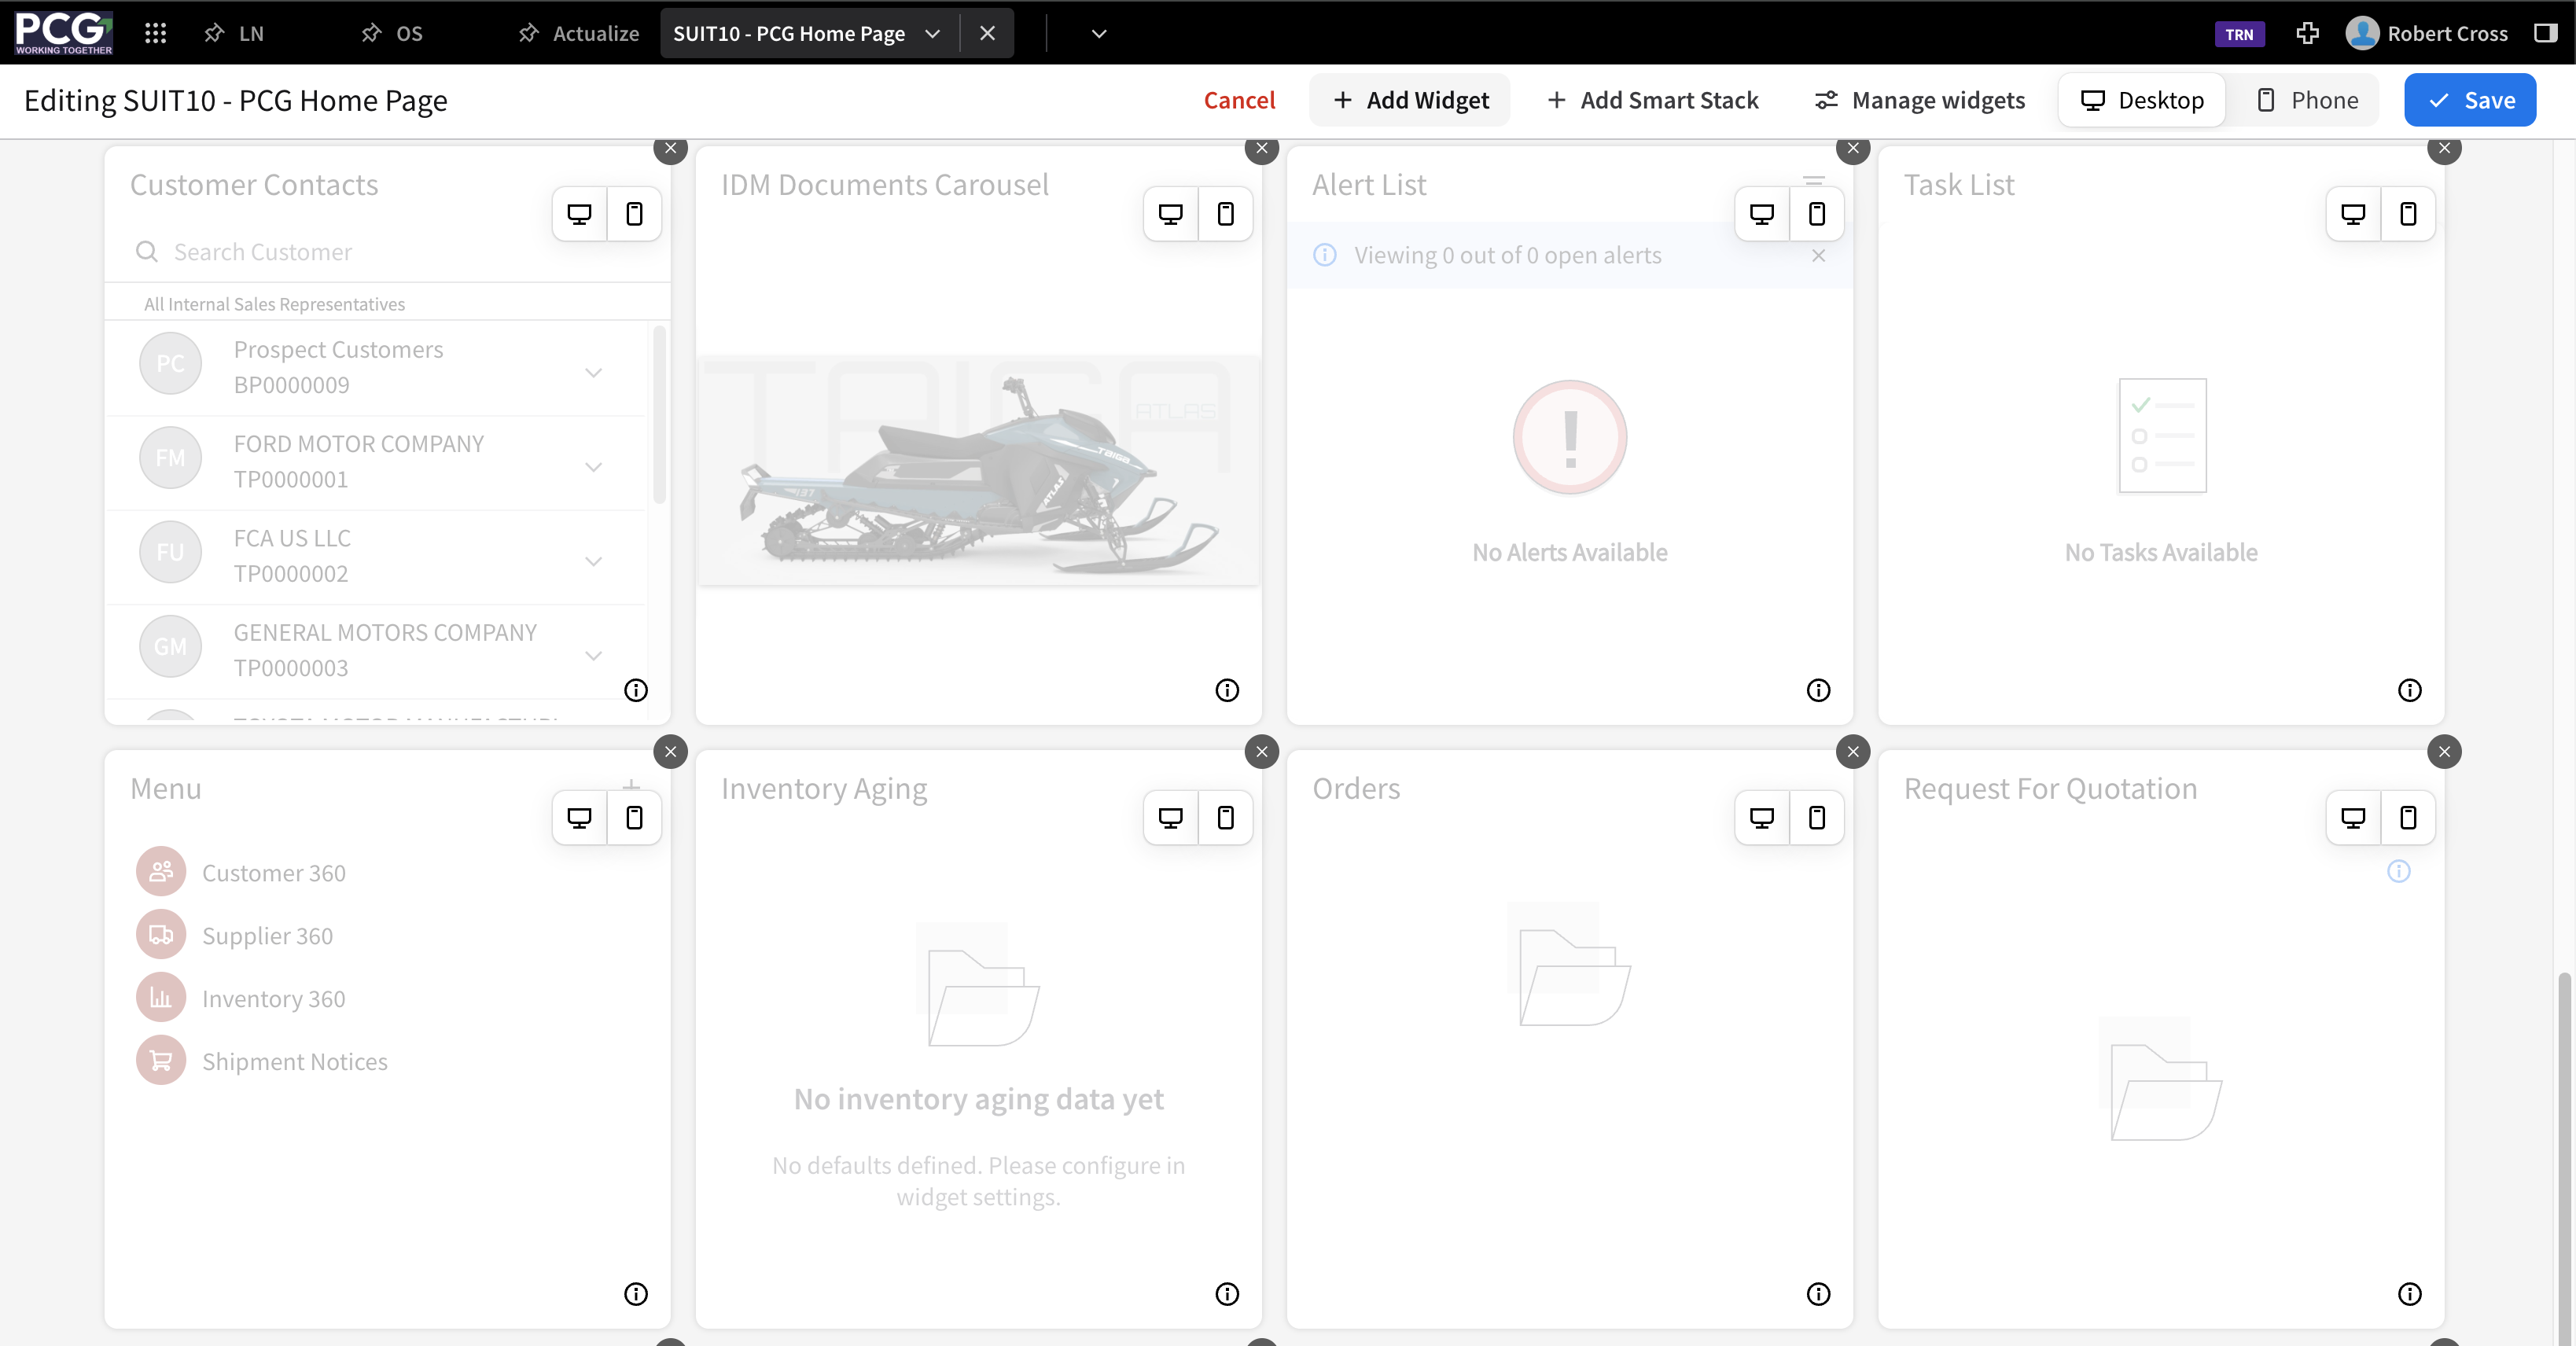
Step 5: Create a Workspace Widget
As part of Infor OS, a user can have a set of workspaces available to them. A workspace is a collection of widgets that can be suitable to different users or roles in the organization. AskQ can be set up to be one of the widgets on the homepage as follows.
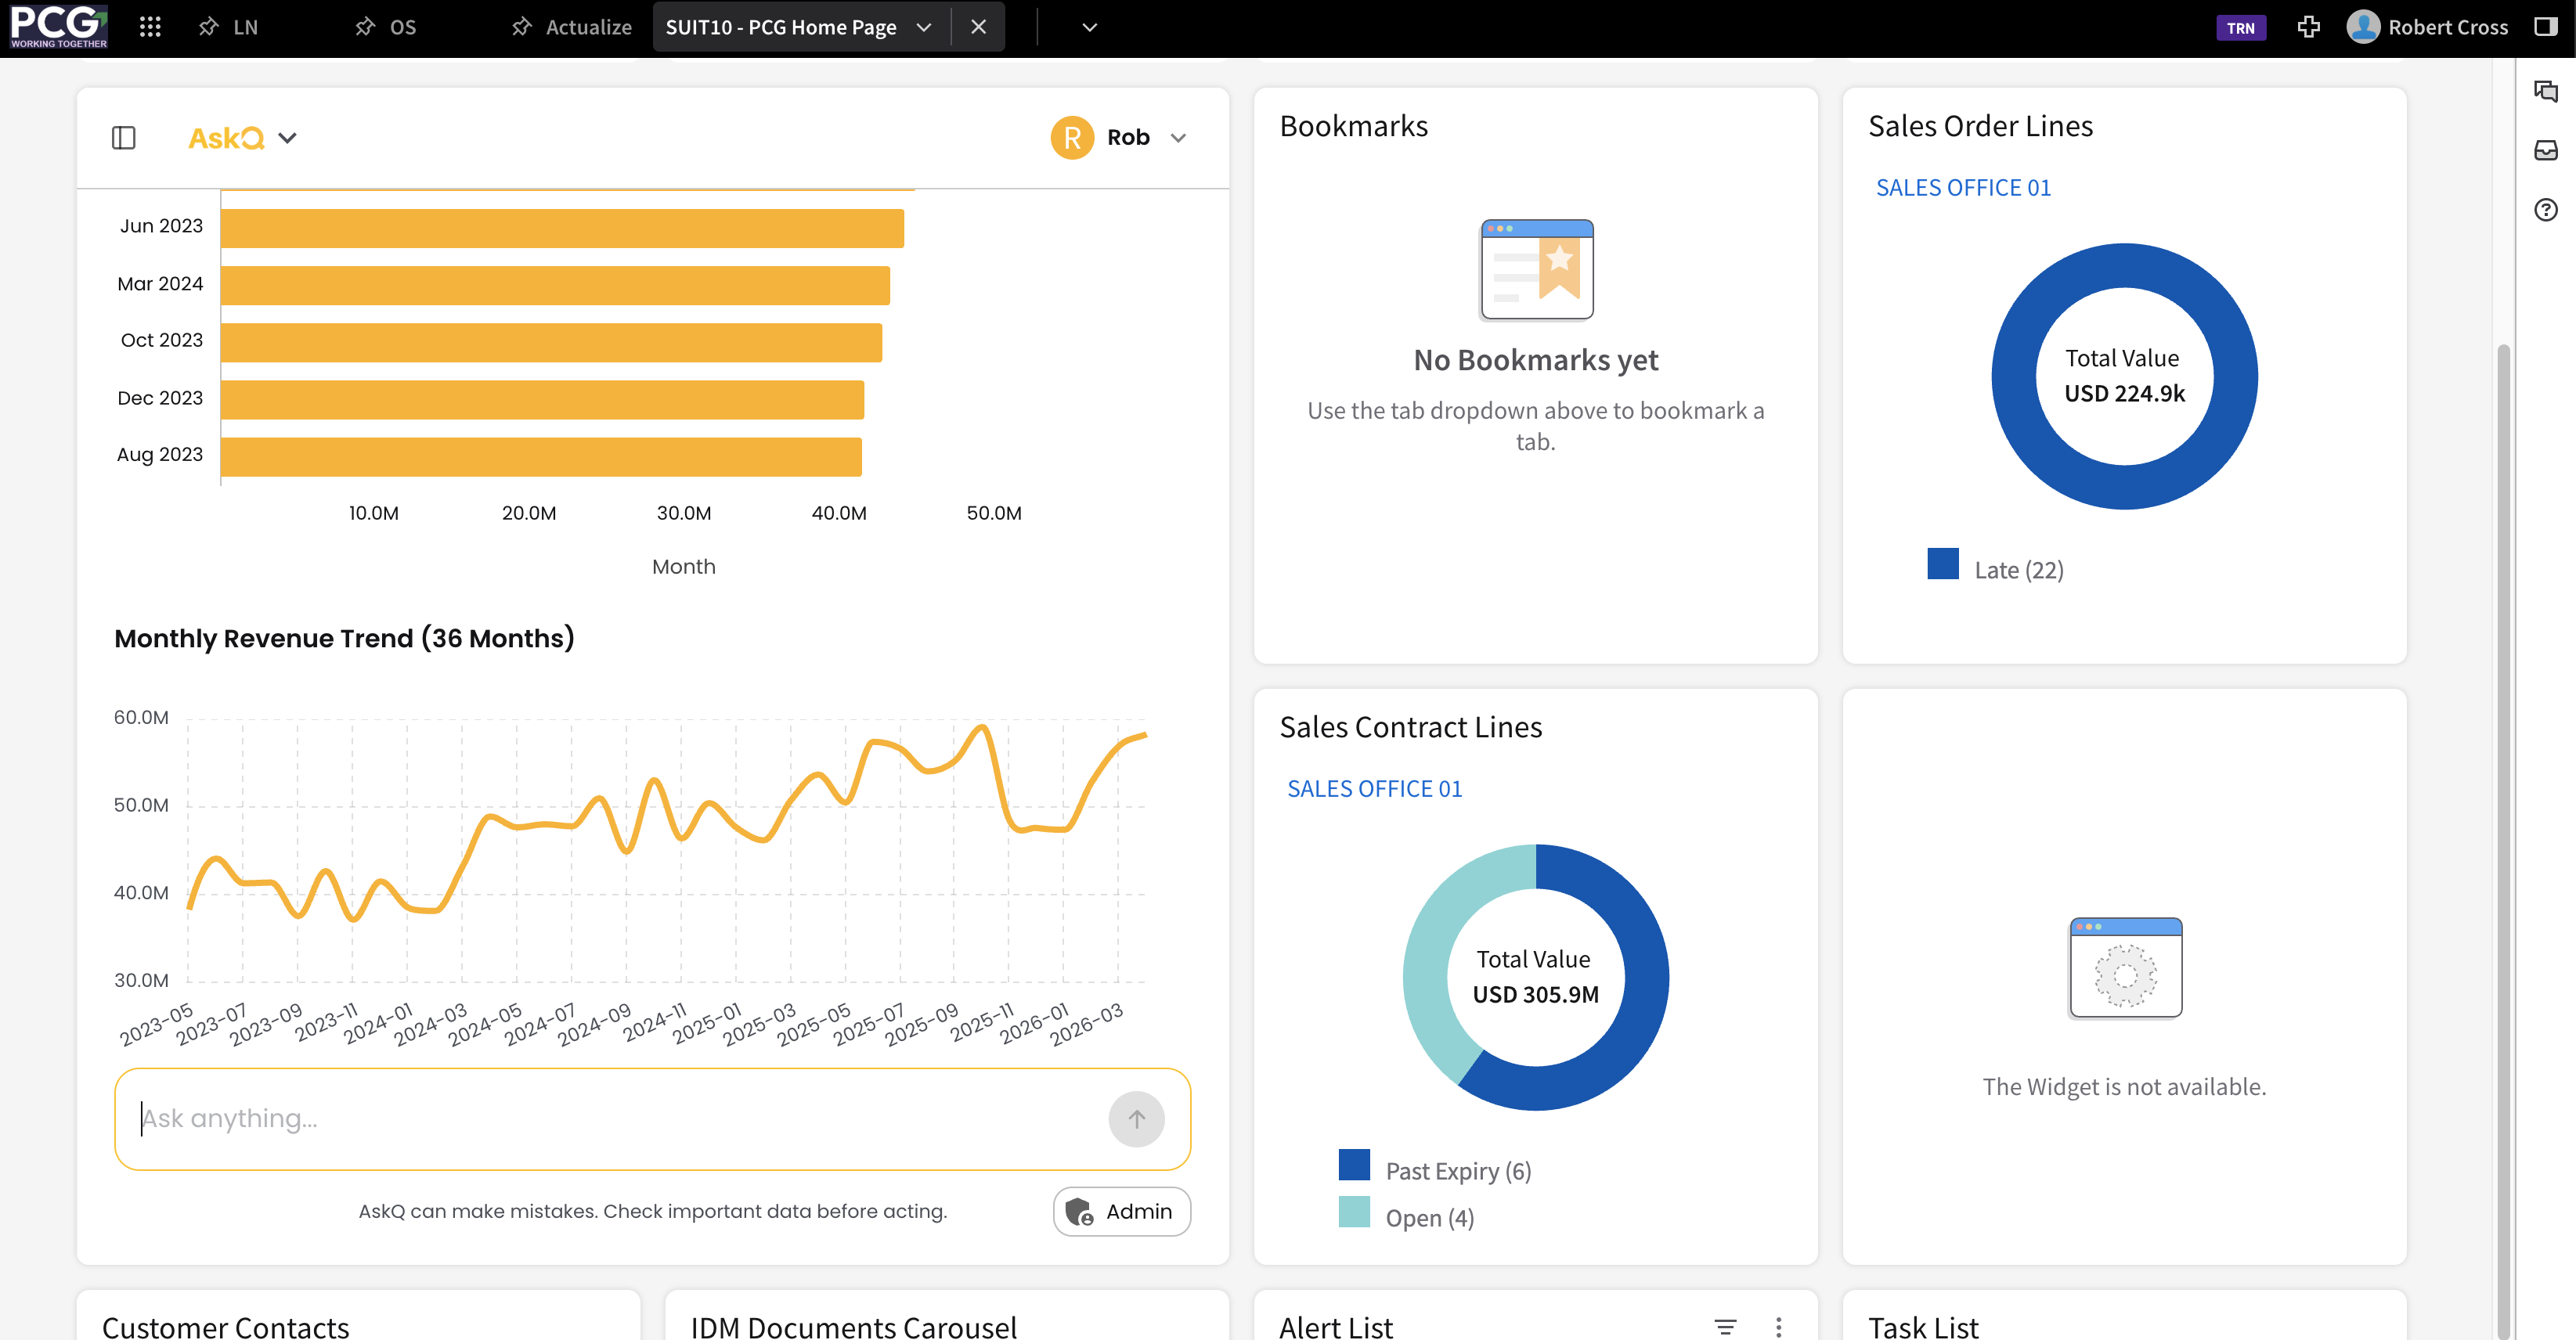
To embed AskQ as a widget similar to the above, do the following:
- Edit a workspace and navigate to the Edit Layout view.
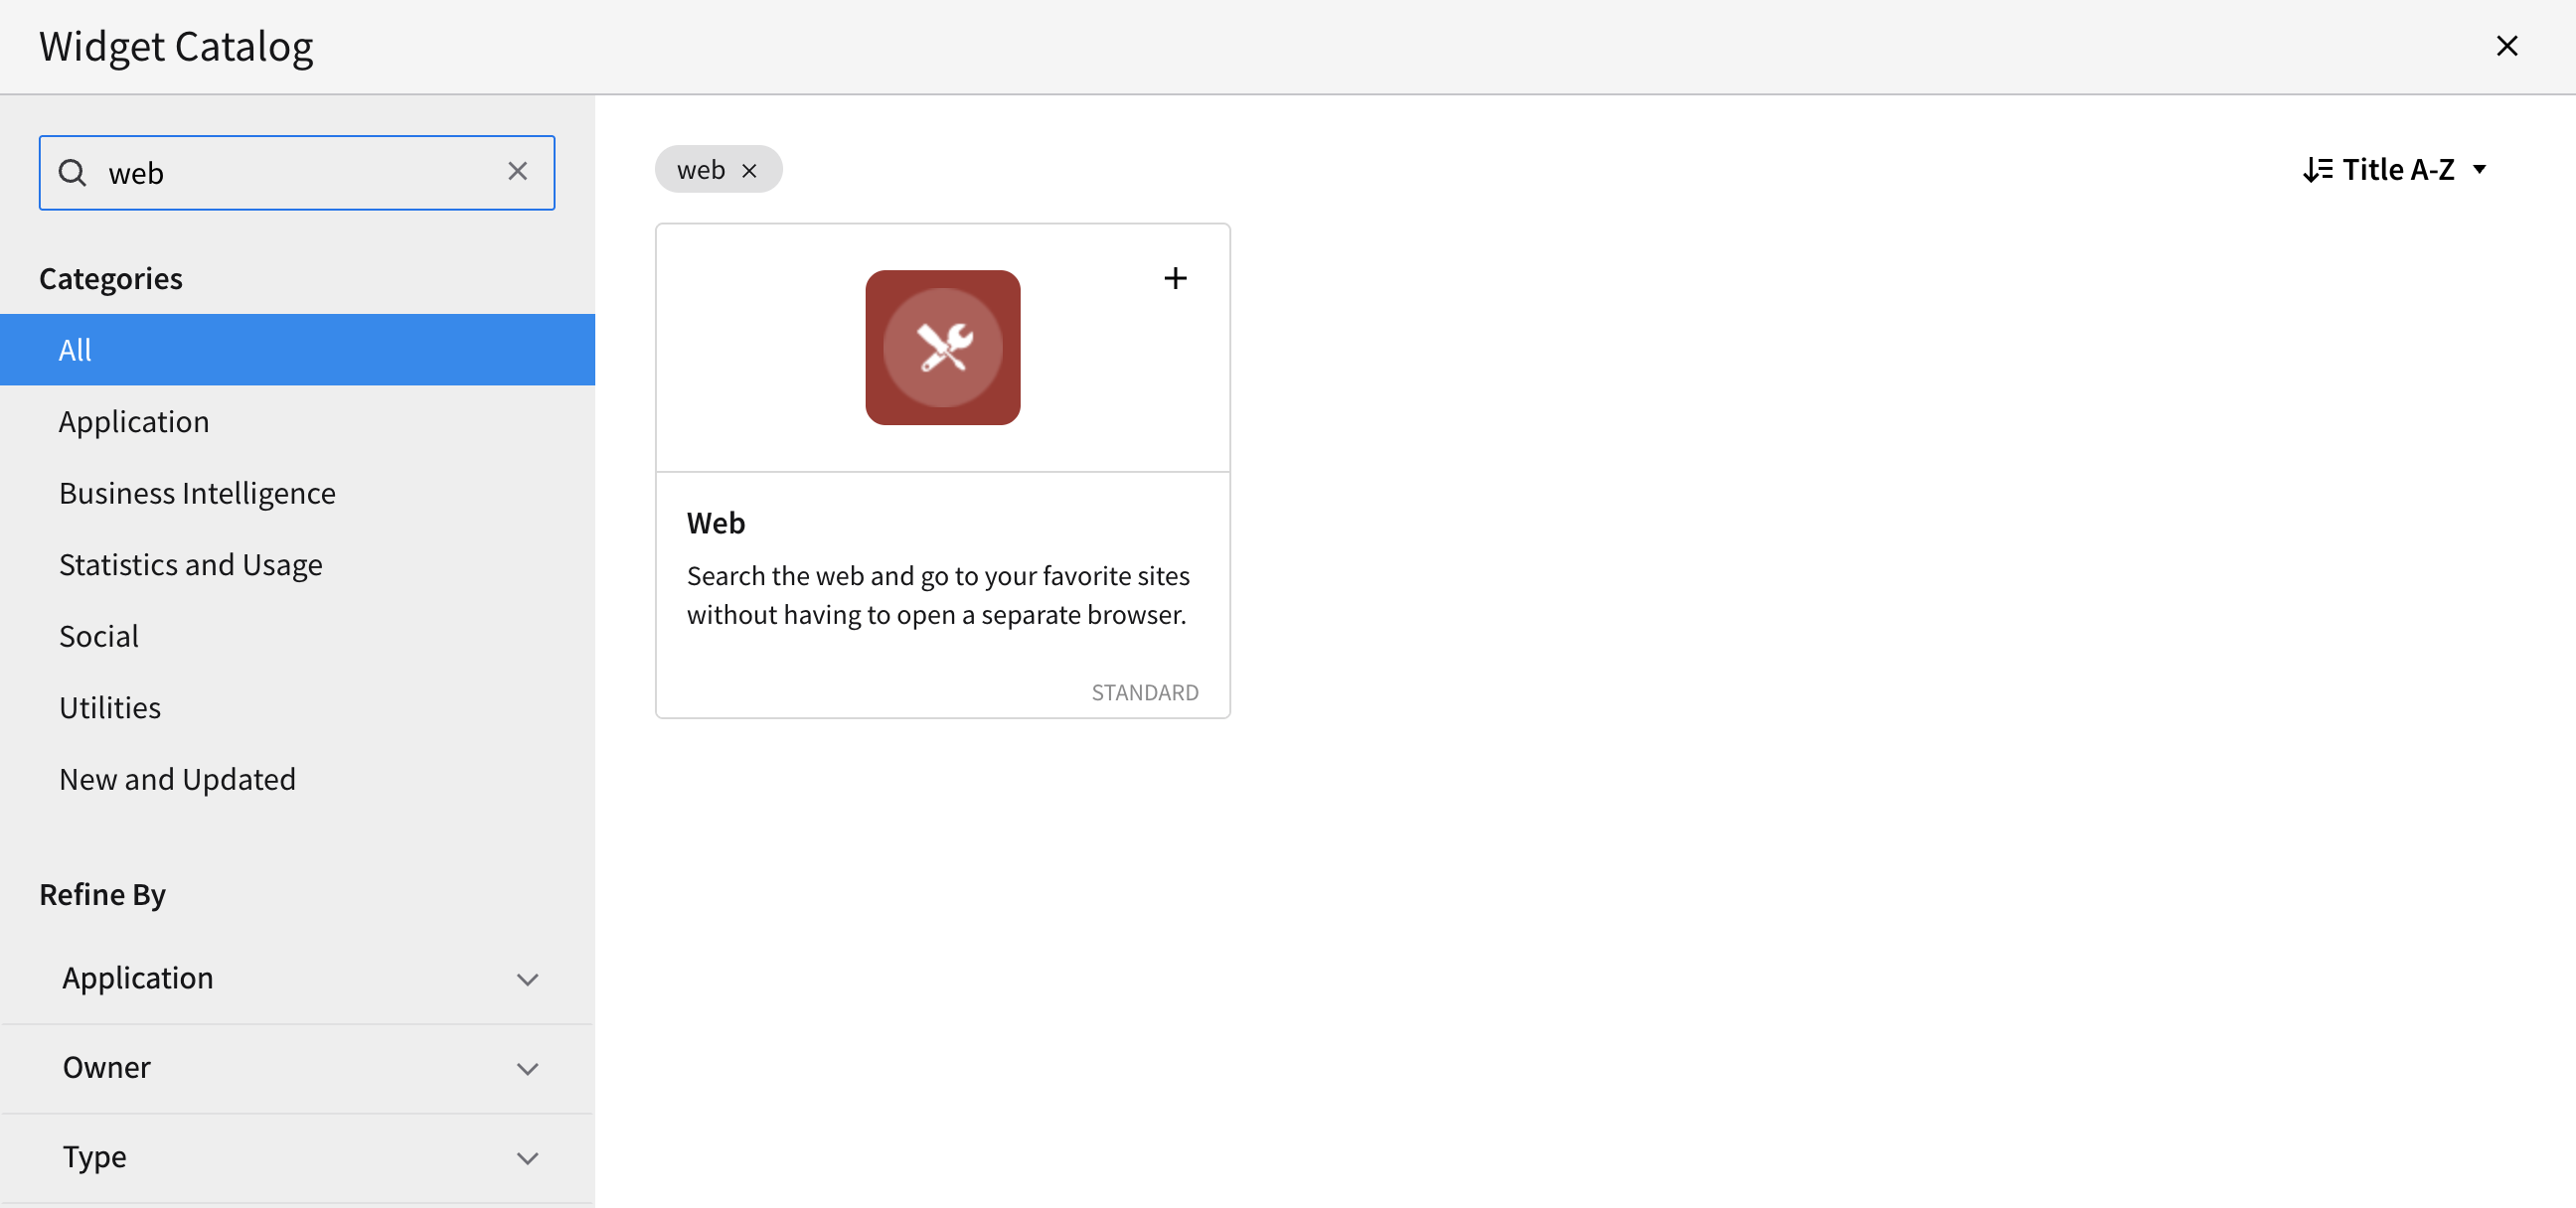
- Select Add Widget
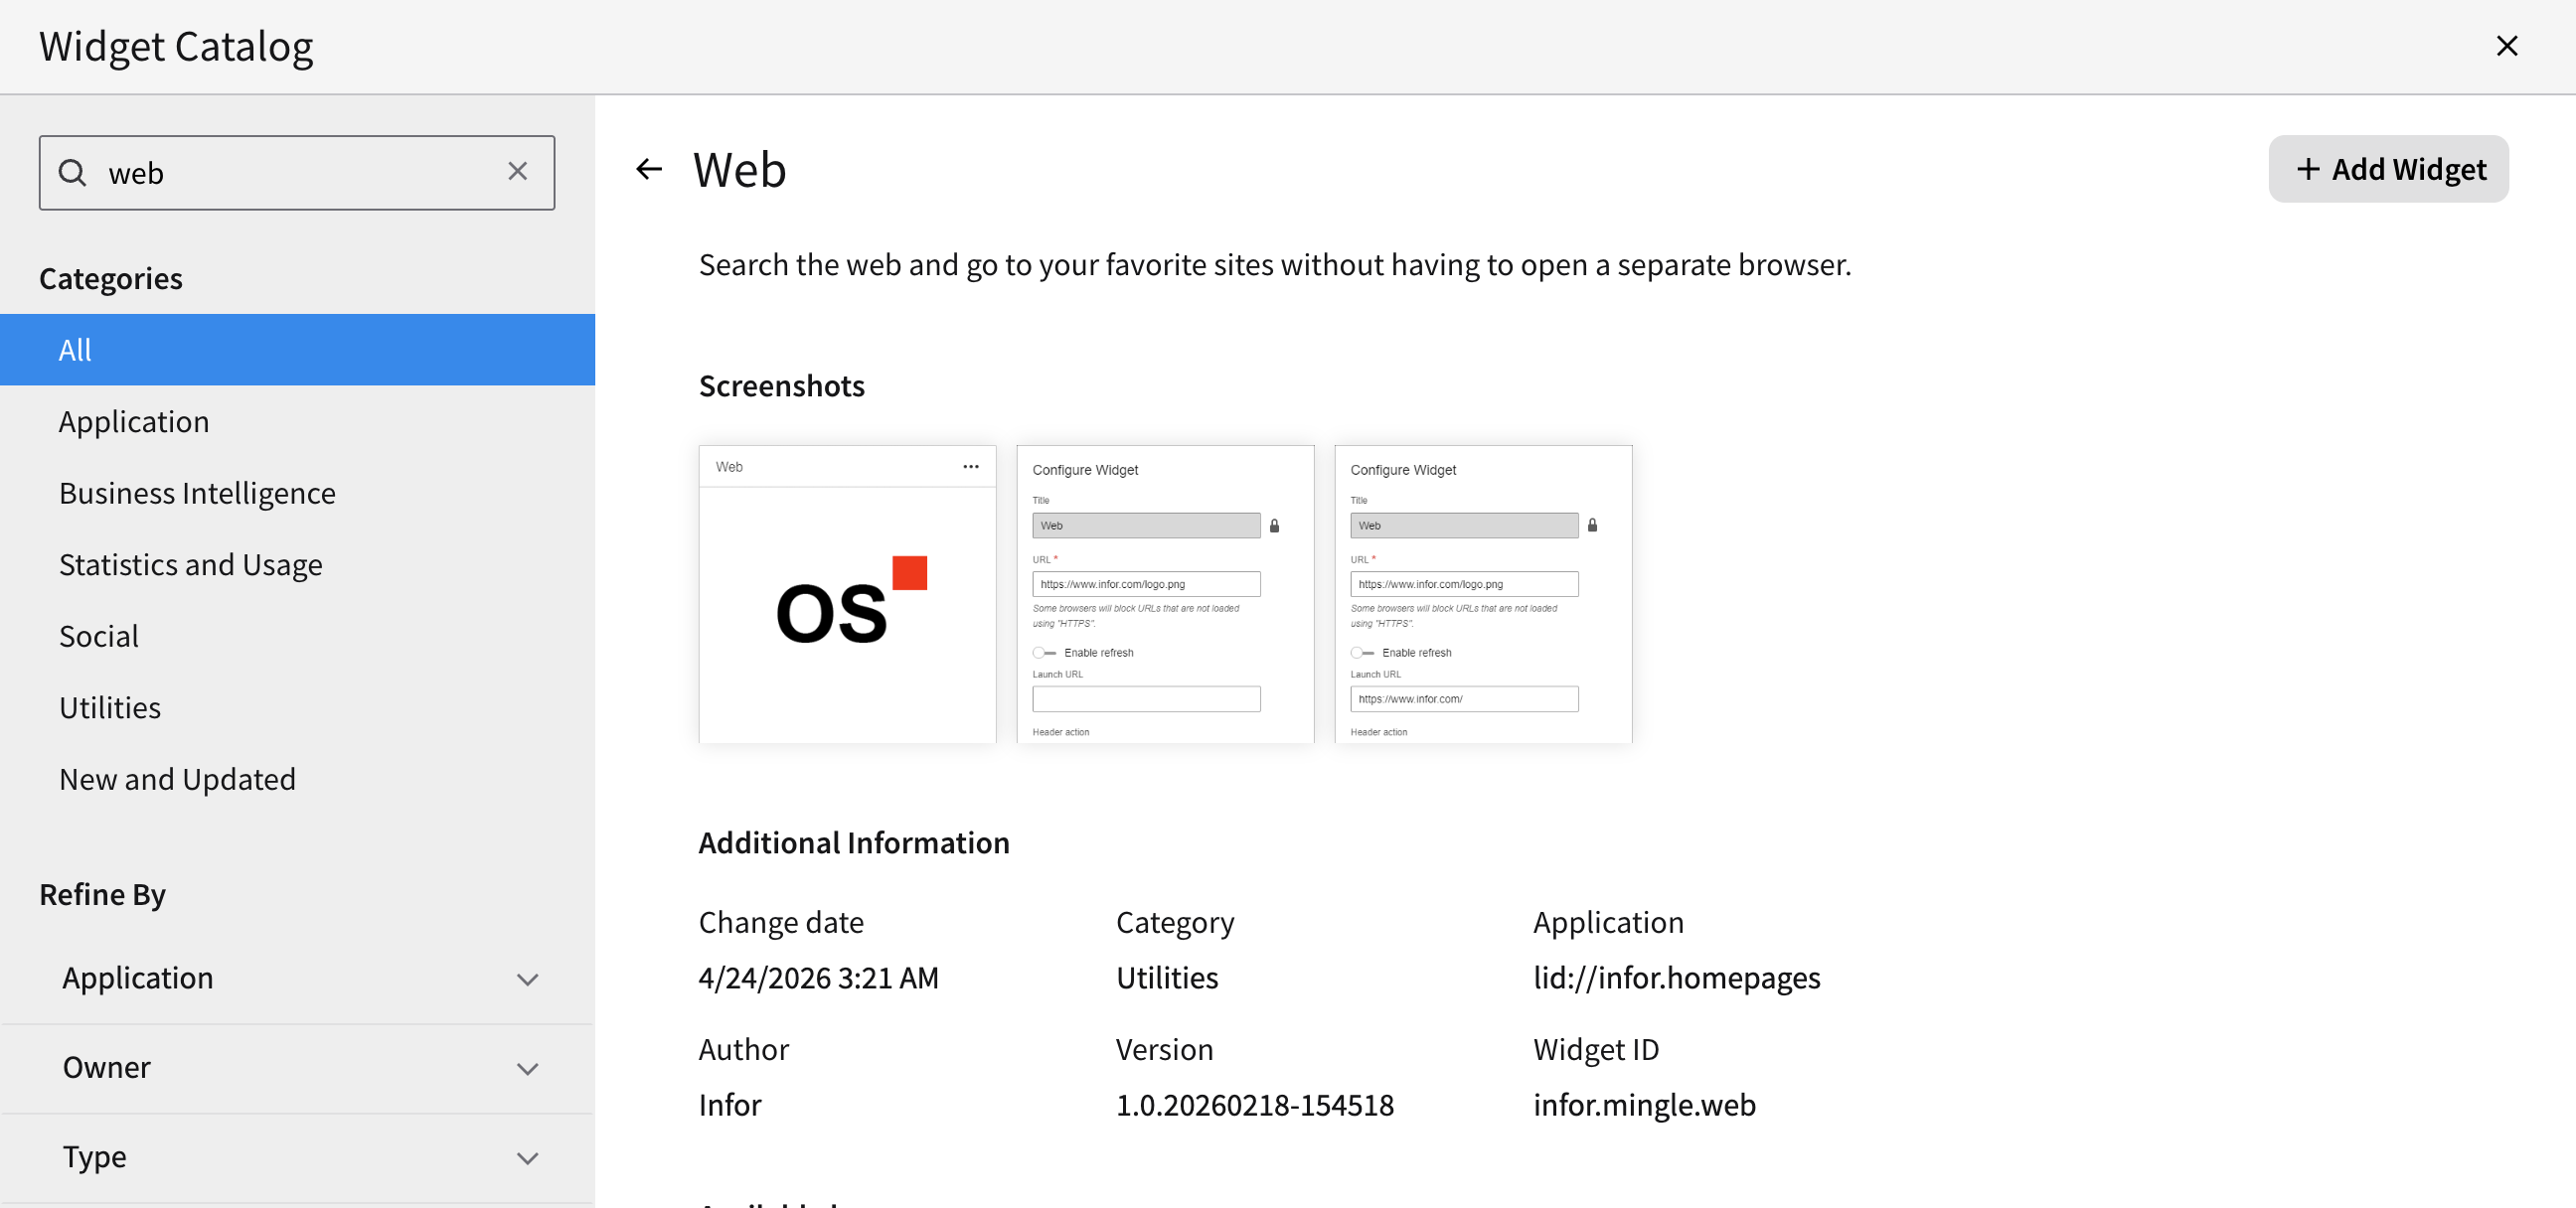
- Search for 'web' in the Widget Catalog and click on the Web widget
- Select Add Widget
- Save the Layout and find the Configure Widget button on the new Widget
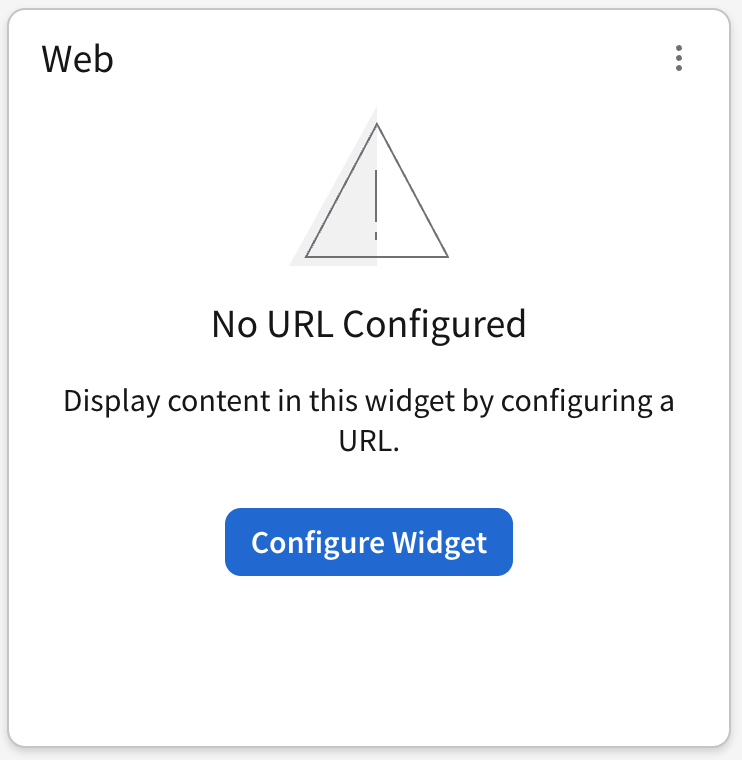
- Unlock the title and set the Title to be AskQ. Set the URL to be the Application URL from Step 2 of this guide and unset Show header. Press Save.
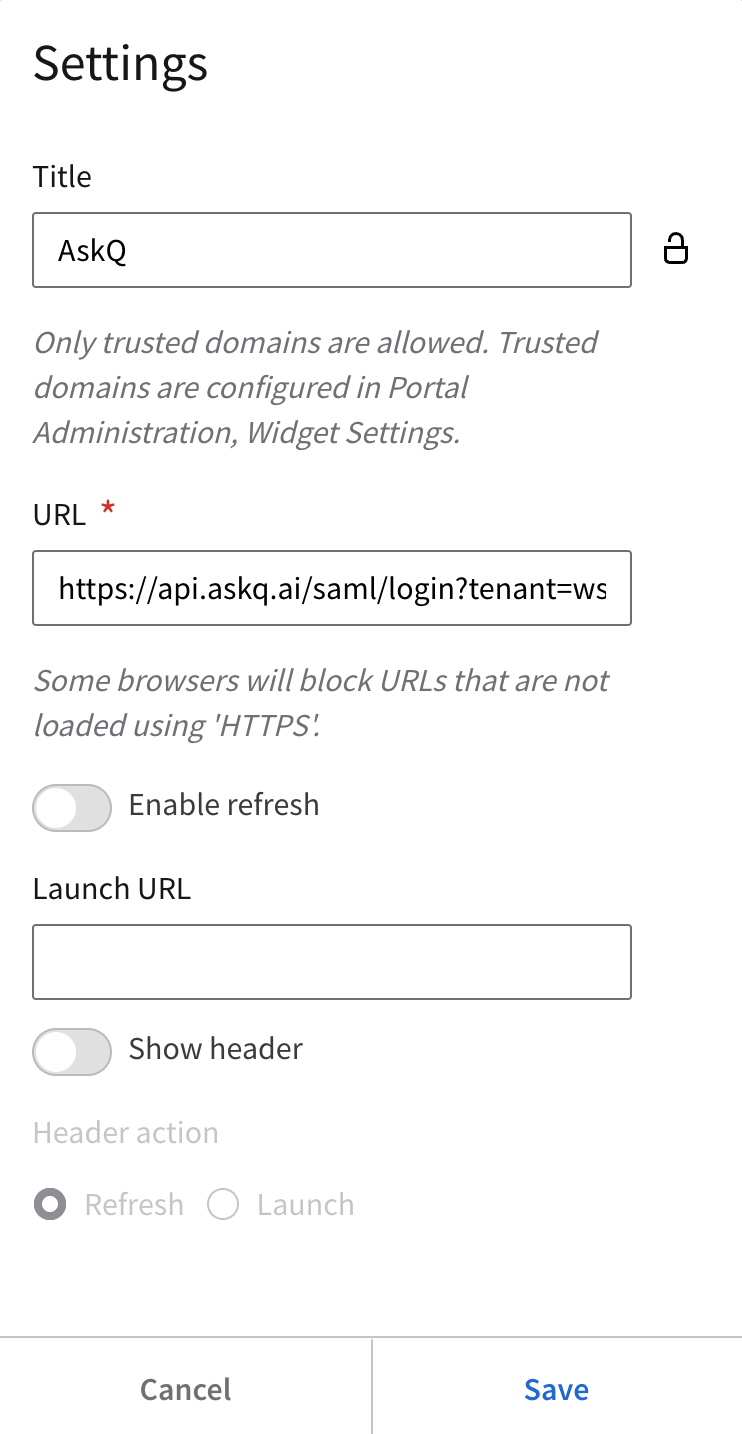
- A widget size can be customized to meet the needs of the users.
- Publish the workspace once you're ready.
Was this article helpful?
That’s Great!
Thank you for your feedback
Sorry! We couldn't be helpful
Thank you for your feedback
Feedback sent
We appreciate your effort and will try to fix the article